Showing posts with label Die Cutting. Show all posts

Friday, April 21, 2017

SSS Wednesday Challenge - Showers or Flowers

For this week the Simon Says Stamp Wednesday Challenge is Flowers or Showers, so I went with flowers! Unfortunately my paper cutter needs a new blade so forgive my fuzzy edges, :(. 
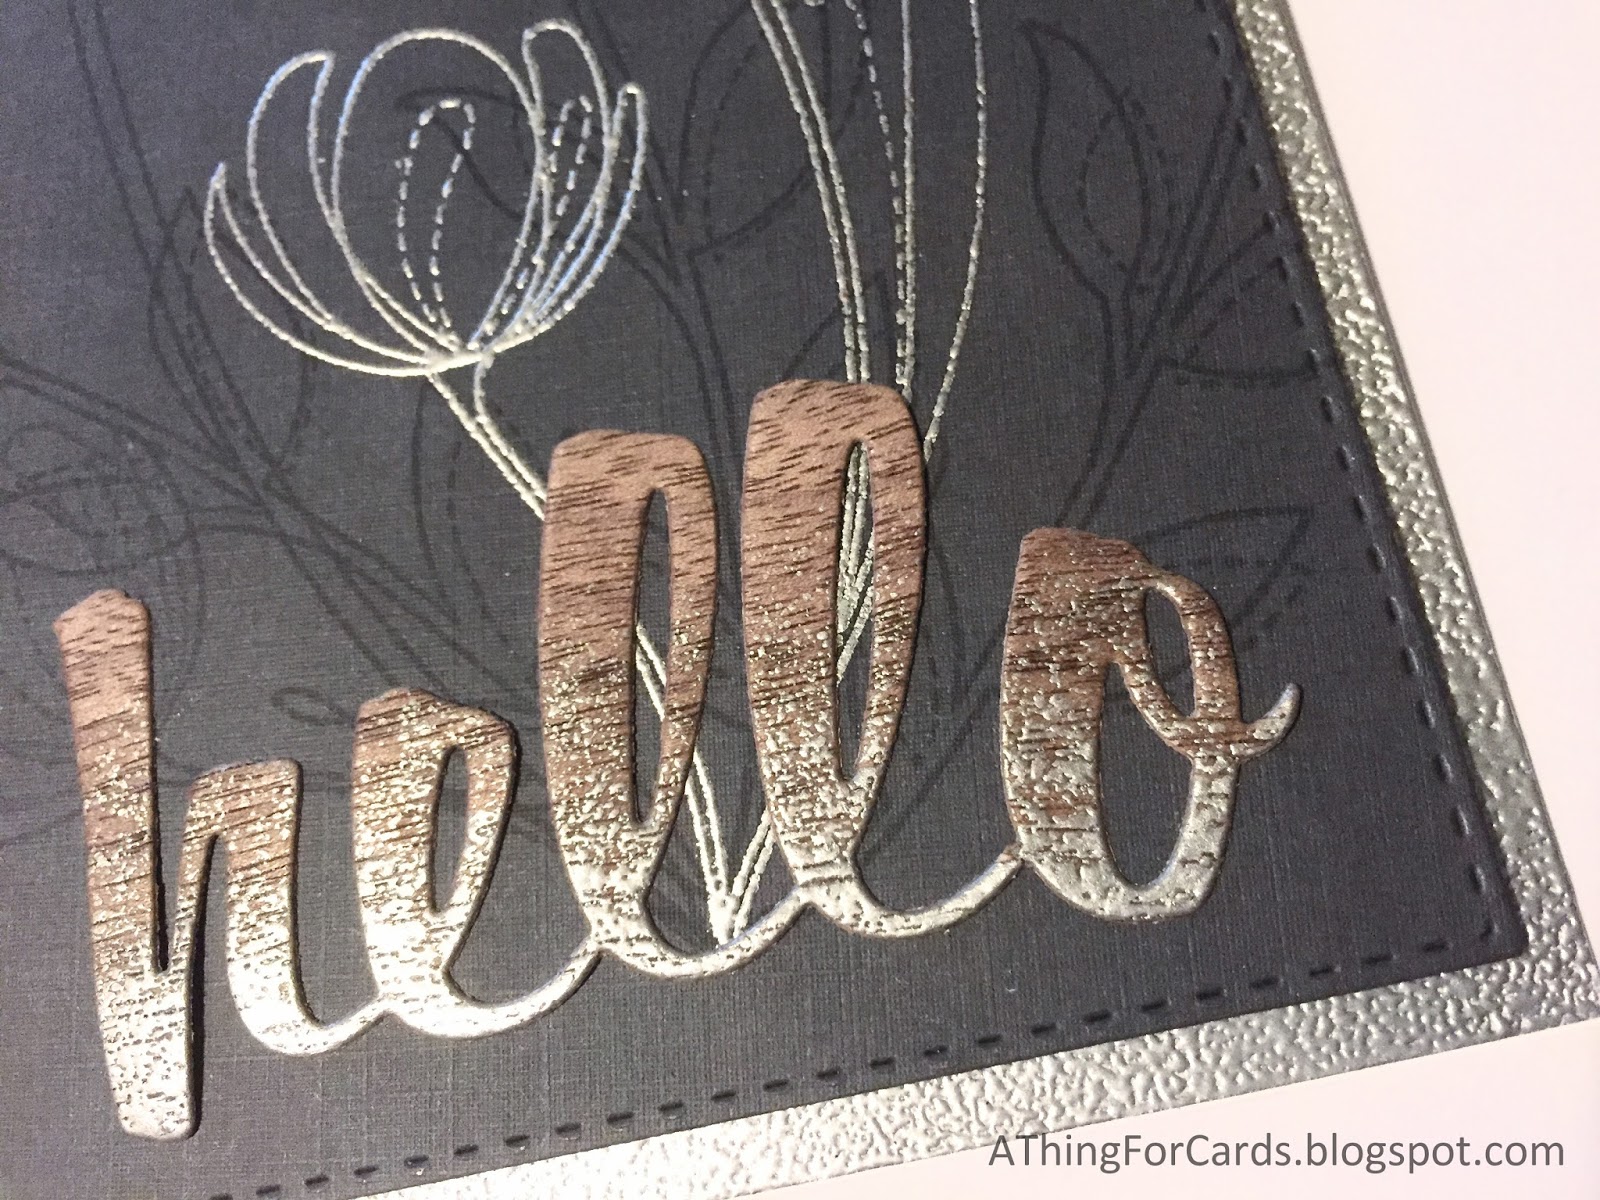
I used the beautiful flowers from both Simon Says Stamps Spring Flowers and More Spring Flowers sets. I heat embossed them on gray card stock with clear embossing powder. 
Then I went to town with my Distress Oxide inks, I first colored all of the flowers in with pretty heavy coat, then while it was still wet I sprinkled each of the colors all over the image. I did some partial drying then splashed on some clear water mixed with shimmer. Then picked up some color with a paper towel. 
I came back in with a light gray Copic marker to add some shading. I used the smile die from the My Favorite Things Sending Smiles set. I also used their Stitched Basic Edges to cut the panels for the top, bottom and center. 
I adhered everything to a pale purple card base and added a few sequins to finish it off!
 Thank you for coming over to take a look! 
This car was totally inspired by a card that Michelle from @CraftCradle created!

Saturday, April 15, 2017

MFT Sketch Challenge #328 - Doodled Blooms

I decided to use the Doodled Blooms MFT kit for this weeks My Favorite Things Sketch Challenge. I love this kit, the sentiments and stamps are super cute and perfect for all kinds of cards. I went a bit outside my comfort zone this week with lots of gold. 
 I chose a gold glitter card stock from my stash for the bottom layer, I stacked some gold pattern paper on the as the next layer. I then added a smaller piece of Tim Holtz watercolor paper that I painted with my Zig Clean Color Real Brush Markers. I sort of just scribbled the three colors on and then added water to spread and blend them. 
 I added a diagonal piece of gold dotted paper across the watercolor layer. The images were stamped with gold ink and clear heat embossed. I then colored the images with my Copic Markers and stuck them on the vellum. I decided to stamp the sentiment on a piece of the watercolor paper that was left over and adhered it on top. I attached the velum with double sided tape under the flower and sentiment strip.  I finished it off with a few sequins and I was done! 
Thank you so much for stopping by to take a look! 


Thursday, April 6, 2017

Lawn Fawnatics 2 - Interactive Loads of Fun!

For the second Lawn Fawnatics Challenge the theme was interactive cards! I used the Lawn Fawn set "Loads of Fun". My interactive element is a water filled washing machine! 
 I stamped the images and colored them with Copic Markers. I fussy cut the elements and used a circle die to cut the center of the washing machine. I colored another panel to go behind the washing machine with all of the clothes. 
 The assembly is much like a regular shaker but I used a small baggie filled with water, glitter and tiny glass beads (the kind with no hole). I was so excited to find that when you shake the card bubbles appear! I glued the bag shut and taped it too just to be safe and prevent any leaks. 
 I found some wood pattern paper for the floor, and the floral paper that reminded me of my grandmothers laundry room for the wall paper. I cut the background with a stitched rectangle die and cut a hole in it to match up to the front washing machine image. 
 I added the washing machine to the front with a piece of acetate for the window on top of the bag and background image. I stamped the sentiment on a green banner and adhered it along with the other  laundry elements to the front of the card to finish it off.
 Thank you so much for checking it out! 
Here is a video (hopefully, this is the fist time I have tried to add a video!) to see the water in action! 


Wednesday, April 5, 2017

SSS Monday Challenge - Rainbows!

The theme for the Simon Says Stamp Monday Challenge this week is Rainbows, they are also focusing on Tim Holtz products, there is no better time to pull out my distress inks! 
Using my Misit to ensure both panels were identical I stamped the WPlus9 Doodle Buds all over two pieces of Distress Water Color card stock and heat embossed them with white embossing powder. 
 I water colored each piece with distress inks, I used every color in the rainbow! Each panel was colored the same but I used a lot of concentrated ink for the main panel and used really diluted pale color for the second. I then used the My Favorite Things Happy Birthday Centerpieces die-namic to cut the the "Happy Birthday" from lighter panel. 
 Then I adhered the "Happpy Birthday" to the darker panel lining up the images so the design is seamless between the layers. I added a shadow to the letters with a Copic multi liner to help them pop a bit more. 
 I then added some sparkle with a Spectrum Nior Sparkle Pen, but only on the darker panel. Then I die cut the whole thing with the largest of the Simon Says Stamp Stitched Rectangle Dies and added it to a bright yellow card base.
Thank you so much for taking a look!
I am also entering this card in the Simon Says Stamp Wednesday Challenge where the theme is Happy Birthday! 

Friday, March 31, 2017

Wood Hello Spring Flowers.

I found this pack of adhesive backed wood veneer at Target on clearance, and I wondered if I could die cut it. Well it turns out it cuts beautifully!
I stamped the two main flowers with the Simon Says Stamp Spring Flowers set and heat embossed them with silver embossing powder, then I stamped the other flowers and leaves in versamark ink, I really like the watermark on dark grey paper. 
For the hello die cut I sort of lightly tapped it with the versa mark pad toward the middle and applied more pressure toward the bottom. When I applied the embossing powder I also brushed some away towards the middle leaving heavy cover toward the bottom of the word. This give it a dipped in silver look. 
I originally put it on a black background but that wasn't quite right, so kind of pounced the embossing powder around the edge of a white panel and sprinkled the embossing powder around the edges. The lighter coating created this bumpy almost hammered look.
I am extremely happy with the way this card turned out. I appreciate you stopping by to take a look! 


Oh Happy Day! Cling Wrap Smooshing.

For this weeks challenge Simon Says Stamp said Any Thing Goes!  I decided to pay with my new Distress Oxide inks again, this time I tried the cling wrap technique.
I smooshed several colors on cling wrap, spritzed it a bit to get it wet then pressed it down on some water color card stock and mushed it around. I let it dry over night, which was hard because I really wanted to mess with it. But I did not, and I was glad the effect is really striking.
I cut a strip from the panel I made, die cut the words and some hearts from the remainder. I used the Oh Happy Day and the Holiday Shapes Hearts & Stars dies from Simon Says Stamp. I added a strip of glitter card stock then stacked a piece of Neenah white to adhere the die cuts to. I stuck them down with a glue pen and I was done!
Thanks for stopping by to look! 


Sunday, March 26, 2017

MFT Color Challenge 66

For My Favorite Things color challenge #66 we were given the task of making a card with Four colors, Safety Orange, Cranberry Cocktail, Tropical Teal and Tangy Orange.
I had some trouble getting started and finally found inspiration with the arrow patterned paper which is found in the MFT Free Spirit 6" x 6" paper pack. I used the MFT Stepped Up Chevron dies for the horizontal element. I blended ink on a piece of Neena Solar White card stock with mustard seed and orange to try and match the Safety Orange, then covered it in clear embossing powder and adhered bit of teal card stock peak out from the peaks and valleys. 

 I cut the word hugs from a piece of Neenah that I inked up with orange and heat embossed with clear powder. I used the MFT Sweet Succulents stamp and die-namics for the cacuts and pot, I colored them with copic markers, glitz-ed them up with Wink of Stella and attached them with foam dots. 
Thanks for stopping by to take a look!


Saturday, March 25, 2017

Doodled Blooms MFT Sketch Challenge #325

For the My Favorite Things Sketch Challenge #325 I decided to use the square floral image from the new Doodle Blooms kit. I used the sentiment from the MFT Rainbow of Happiness stamp set and the word "Color" from the Color the Rainbow die-namics.
I stamped the flower several times on white card stock to create a pattern and colored it in various shades of gray then added white accents with my gel pen. I decided the images were a bit too dark so I cut a piece of vellum to lay over the image to tone it down a bit.
 I cut a frame of black card stock to hide the glue I used to adhere the vellum and glued it on top. Then I stamped the flower and leaves again, colored them with bright colors, added some white gel pen accents and cut them out using the matching dies. I then added the flower and leaves on top of the frame.
The sentiment was heat embossed in white on black card stock and then I cut it out with one of the banners from this months free die set, Rectangle Window Word Frames. The word die from the Color the Rainbow die-namics set fit perfectly on the strip. 
Thank you for taking a look!


Wednesday, March 22, 2017

Distress Ink Multi-Level Die Inlay!

For the Simon Says Stamp Wednesday challenge we were asked to use more than one die or punch. I used two, the Simon Says Stamp Chevron Background die (I don't think they sell it anymore) and the Lil' Inker Hello die.

I used Distress ink and smooshing to create the main panel on Distress water color paper. I then used the chevron background die to cut the water color panel and some teal card stock.
I put the the teal card stock panel on my card base and then attached the water color panel on top. I then adhered the negative pieces in their places without the teal card stock under them so they are recessed from the rest of the image. If you try this with a die with a lot of similar shapes be sure to do a better job than I did keeping them straight. I spent way too much time trying to get them back where they went!
I cut the "hello" from the same teal card stock, added a bit of shimmer with my Wink of Stella pen and then adhered it on top. 
Thanks for taking a look!